-
Blog
-
Fabric
- Clearance Fabric - 30% off
- Featured Bundle of the Month
-
Fabric Collections
- AGF Studio
- BEST Ombre Confetti by V and Co.
- Color Crush by V and Co.
- Floral Elements by Art Gallery Fabrics
- Grunge by BasicGrey
- I Heart Ombre by V and Co.
- Moda Bella Solids
- Ombre by V and Co. (original)
- Ombre Confetti by V and Co.
- Ombre Fairy Dust by V and Co.
- Ombre Flurries by V and Co.
- Ombre Galaxy Metallic by V and Co.
- Ombre Wovens by V and Co.
- PURE Solids by Art Gallery Fabrics
- Spotted by Zen Chic
- Thatched by Robin Pickens
- 108" wide Ombre Confetti Backing Fabric by V and Co.
- Gilded by Alli K.
-
Fabric Designers
-
Fabric Manufacturers
-
Precut Bundles
- Quilt Kits
- Seasonal Bundles & Kits
-
New Fabrics
-
Fabrics by Color
-
Hand Dyed Fabric
- Coming Soon - Preorder
- Scrap Bags & Bolt Ends
- All Yardage
- All Fabric
- Last Chance Fabrics
- Destash Fabric Sale!
- Discontinued Fabrics (all gone)
-
Patterns
- Pattern & Bundle of the Month
-
Pattern Designers
- A Quilted Life - Krista Moser
- Alison Glass
- Cluck Cluck Sew
- Cristy Fincher
- Latifah Saafir
- Laundry Basket Quilts
- Laura Heine - Fiberworks
- Lo & Behold Stitchery
- Lori Holt
- Modern Handcraft
- Needle in a Hayestack
- Pen + Paper Patterns
- Quilty Love - Emily Dennis
- Robin Pickens
- Sharon Schamber
- Toad & Sew
- V & Co.
- Violet Craft
- Color Girl Quilts
- Nydia Kehnle
- New Patterns
- $6 Quilt Blocks - PDFs
- Quilt Kits
- Seasonal Quilt Patterns
- All Patterns
-
Patterns by Type
-
Applique
- Quilt Binding
- Printed Quilting Patterns
- Quilt Designing
- Quilt Painting
- Hand-dying Fabric
- 2019 BOM - The Gardens
-
2018 BOM - Stellar Stars
-
2017 BOM - Silk Society Stash
- Books
- Pen + Paper Patterns - Quilt Kits
-
Notions
- New Notions & Supplies
-
Fun Stuff!
- Glue Basting
-
Thread
- Rulers & Cutters
- Pins & Needles
- Marking Tools
- Interfacing & Foundation
- Pressing Boards & Irons
- For Machine Quilting
- For Applique
- For Curved Piecing
- For Foundation Piecing
- For Machine Embroidery
- For Color & Design
-
Shop by Brand
- Monthly Clubs
- Preorder Class Kits
-
Online Courses
-
Free Motion Quilting
- Digitial Quilting Designs
- Blog
-
Fabric
- Clearance Fabric - 30% off
- Featured Bundle of the Month
-
Fabric Collections
- AGF Studio
- BEST Ombre Confetti by V and Co.
- Color Crush by V and Co.
- Floral Elements by Art Gallery Fabrics
- Grunge by BasicGrey
- I Heart Ombre by V and Co.
- Moda Bella Solids
- Ombre by V and Co. (original)
- Ombre Confetti by V and Co.
- Ombre Fairy Dust by V and Co.
- Ombre Flurries by V and Co.
- Ombre Galaxy Metallic by V and Co.
- Ombre Wovens by V and Co.
- PURE Solids by Art Gallery Fabrics
- Spotted by Zen Chic
- Thatched by Robin Pickens
- 108" wide Ombre Confetti Backing Fabric by V and Co.
- Gilded by Alli K.
- Fabric Designers
- Fabric Manufacturers
- Precut Bundles
- Quilt Kits
- Seasonal Bundles & Kits
- New Fabrics
- Fabrics by Color
- Hand Dyed Fabric
- Coming Soon - Preorder
- Scrap Bags & Bolt Ends
- All Yardage
- All Fabric
- Last Chance Fabrics
- Destash Fabric Sale!
- Discontinued Fabrics (all gone)
-
Patterns
- Pattern & Bundle of the Month
-
Pattern Designers
- A Quilted Life - Krista Moser
- Alison Glass
- Cluck Cluck Sew
- Cristy Fincher
- Latifah Saafir
- Laundry Basket Quilts
- Laura Heine - Fiberworks
- Lo & Behold Stitchery
- Lori Holt
- Modern Handcraft
- Needle in a Hayestack
- Pen + Paper Patterns
- Quilty Love - Emily Dennis
- Robin Pickens
- Sharon Schamber
- Toad & Sew
- V & Co.
- Violet Craft
- Color Girl Quilts
- Nydia Kehnle
- New Patterns
- $6 Quilt Blocks - PDFs
- Quilt Kits
- Seasonal Quilt Patterns
- All Patterns
- Patterns by Type
- Applique
- Quilt Binding
- Printed Quilting Patterns
- Quilt Designing
- Quilt Painting
- Hand-dying Fabric
- 2019 BOM - The Gardens
- 2018 BOM - Stellar Stars
- 2017 BOM - Silk Society Stash
- Books
- Pen + Paper Patterns - Quilt Kits
-
Notions
- New Notions & Supplies
- Fun Stuff!
- Glue Basting
- Thread
- Rulers & Cutters
- Pins & Needles
- Marking Tools
- Interfacing & Foundation
- Pressing Boards & Irons
- For Machine Quilting
- For Applique
- For Curved Piecing
- For Foundation Piecing
- For Machine Embroidery
- For Color & Design
- Shop by Brand
- Monthly Clubs
- Preorder Class Kits
- Online Courses
- Free Motion Quilting
- Digitial Quilting Designs


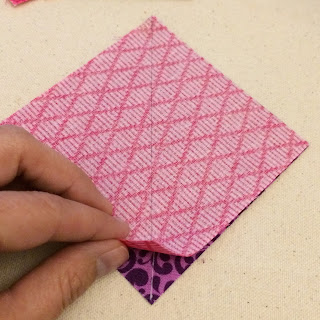
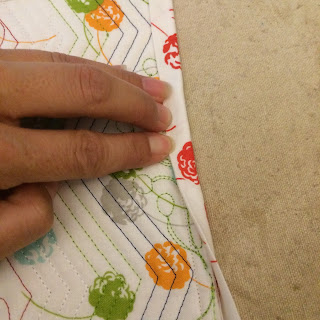
 What is glue basting, you ask? It's probably much like you imagine, but a lot less messy than you fear. Glue basting is a simple techinique that can be used in many many ways:


Suzanne
January 19, 2018
I started glue basting about a year ago when I saw your Mother’s tutorial. I was amazed and went right at it with my next project. I was clumsy at first but once I got a fine tip I became better at it, especially if I made tiny dots instead of a line. This was easier for me and the results are the same. Plus, in those instances when I need a seam pressed open, using dots rather than a line makes it much easier for me to open the seam afterward.
I’ve shared this glue basting technique and with others and they love it as much as I do.